Asus ROG Ally: Easy Connection to TV or Gaming Monitor
The ROG Ally made a significant impact in 2023 as a compelling alternative to the Steam Deck, primarily due to its Windows operating system that allows access to a broader array of games. The subsequent release of the ROG Ally X in the following year not only enhanced its internal components but also improved ergonomics and cooling, making it even more user-friendly. While the ROG Ally is prized for its portability, the ability to connect it to a larger screen for a more immersive gaming experience is a major plus. Both the original and the ROG Ally X models support connections to external displays, whether it's your TV or a gaming monitor. Below, we'll guide you through the process of setting up your ROG Ally for big-screen gaming, complete with step-by-step instructions and recommended accessories.
How to Connect With an Adapter
Connecting your ROG Ally to a TV or monitor can be achieved in various ways, but using an adapter is a straightforward and space-efficient method. Options range from compact dongle-style adapters, direct cables, to the official ROG Gaming Charger Dock. Each of these solutions provides a convenient way to enjoy your games on a larger screen.
What You'll Need

ASUS ROG 65W Charger Dock
The ASUS ROG 65W Charger Dock is the most compact solution for connecting your ROG Ally to a TV. It supports HDMI 2.0 and features USB Type-A and USB Type-C ports. To use it, you'll just need a USB-C and an HDMI cable. This dock not only connects your device to a larger screen but also charges it simultaneously, making it a versatile choice. If you prefer a third-party option, a USB-C to HDMI adapter can be directly connected to the ROG Ally's USB-C port, with an HDMI cable linking it to your TV or monitor. Alternatively, a USB-C to HDMI cable provides a one-cable solution directly from your ROG Ally to the display.
Some USB-C to HDMI adapters include a passthrough USB-C port, allowing you to charge your ROG Ally while playing on an external screen. If your adapter has this feature, you'll need an additional USB-C cable and your power adapter.
How to Connect: Step-by-Step Instructions
- Connect a USB-C to HDMI adapter (or cable) to the ROG Ally's USB-C port on the top of the device. If using the ROG Gaming Charger Dock, connect one end of a USB-C cable to the ROG Ally and the other to the dock's USB-C charging port.
- Attach an HDMI cable to the adapter or Charger Dock, and plug the other end into an available HDMI port on your TV or monitor. For a direct USB-C to HDMI cable, simply connect the HDMI end to your display.
- (Optional) If your adapter has a passthrough USB-C port, connect your ROG Ally's power adapter to charge while playing.
- Turn on the ROG Ally; it should automatically detect and output the video signal.
- Switch your TV or monitor to the correct HDMI input to view your ROG Ally's display.
How to Connect With a Docking Station
For those seeking a setup reminiscent of the Nintendo Switch, a docking station is the way to go. Although the ROG Ally doesn't have an official docking station apart from the ROG Gaming Charger Dock, numerous third-party options are available. These docks not only connect your ROG Ally to a larger screen but also charge it and allow for additional peripherals.
What You'll Need

JSAUX Docking Station HB0603
The JSAUX Docking Station HB0603 is an excellent choice, offering 100 watts of power for fast charging and multiple ports, including HDMI, USB-C for charging, and additional USB ports for peripherals. It's compact and doubles as a stand for your ROG Ally. More advanced docks may include extra features like Ethernet ports for a stable internet connection, SD card slots, and even a Display Port for multiple monitors. Smaller, portable docks are ideal for travel, and many of those designed for the Steam Deck are compatible with the ROG Ally.
How to Connect: Step-by-Step Instructions
- Place your ROG Ally into the dock.
- Connect the USB-C power cord to the ROG Ally's USB-C port on the top of the device.
- Attach your ROG Ally's power adapter to the dock's USB-C charging port.
- Connect an HDMI cable from the dock to an available HDMI port on your TV or monitor.
- Power on the ROG Ally; it should automatically detect and output the video signal.
- Switch your TV or monitor to the correct HDMI input to view your ROG Ally's display.
You'll Also Need a Controller
While connecting a mouse and keyboard to your ROG Ally's docking setup is possible, using a wireless controller provides the most comfortable gaming experience on a larger screen. The ROG Ally supports any Bluetooth-enabled gaming controller, including top choices like the Sony DualSense, Xbox Elite Series 2, 8BitDo Ultimate, GuliKit KingKong 3 Max, and PowerA Wireless GameCube Style Controller. Some controllers also offer a 2.4GHz wireless connection with a USB adapter for reduced latency and extended range. For a simpler setup, you can opt for a wired USB controller if you're close to your ROG Ally or docking station.
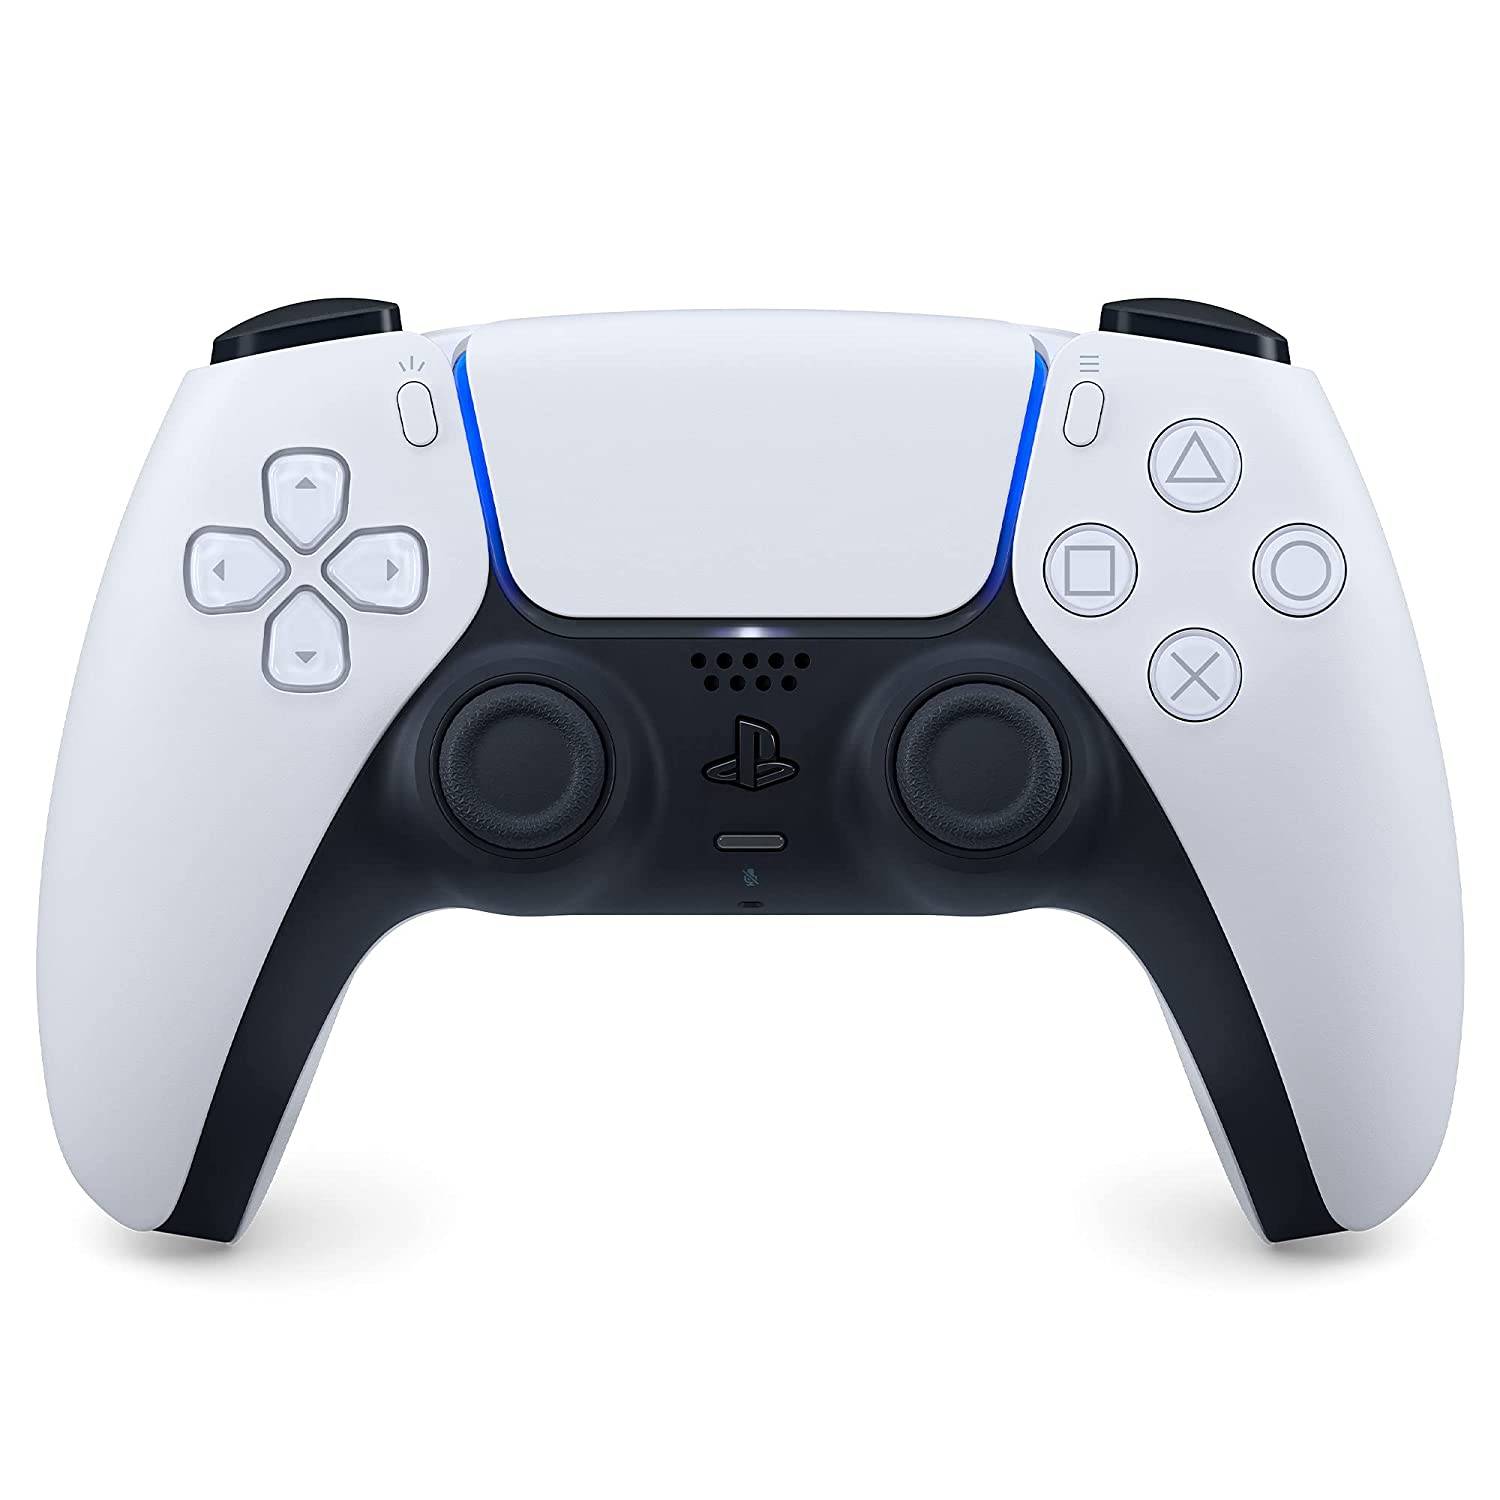
Sony DualSense
The Sony DualSense is highly recommended for its ergonomic design and advanced haptic feedback, enhancing your gaming experience.
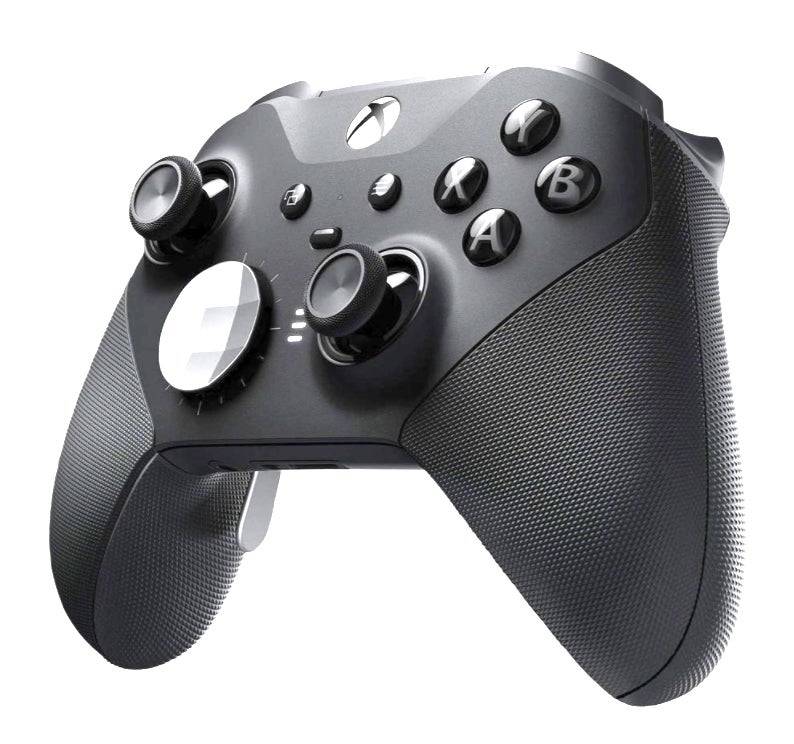
Xbox Elite Series 2 Controller
For those who prefer customizable controls, the Xbox Elite Series 2 offers a premium gaming experience with its adjustable thumbsticks and paddles.
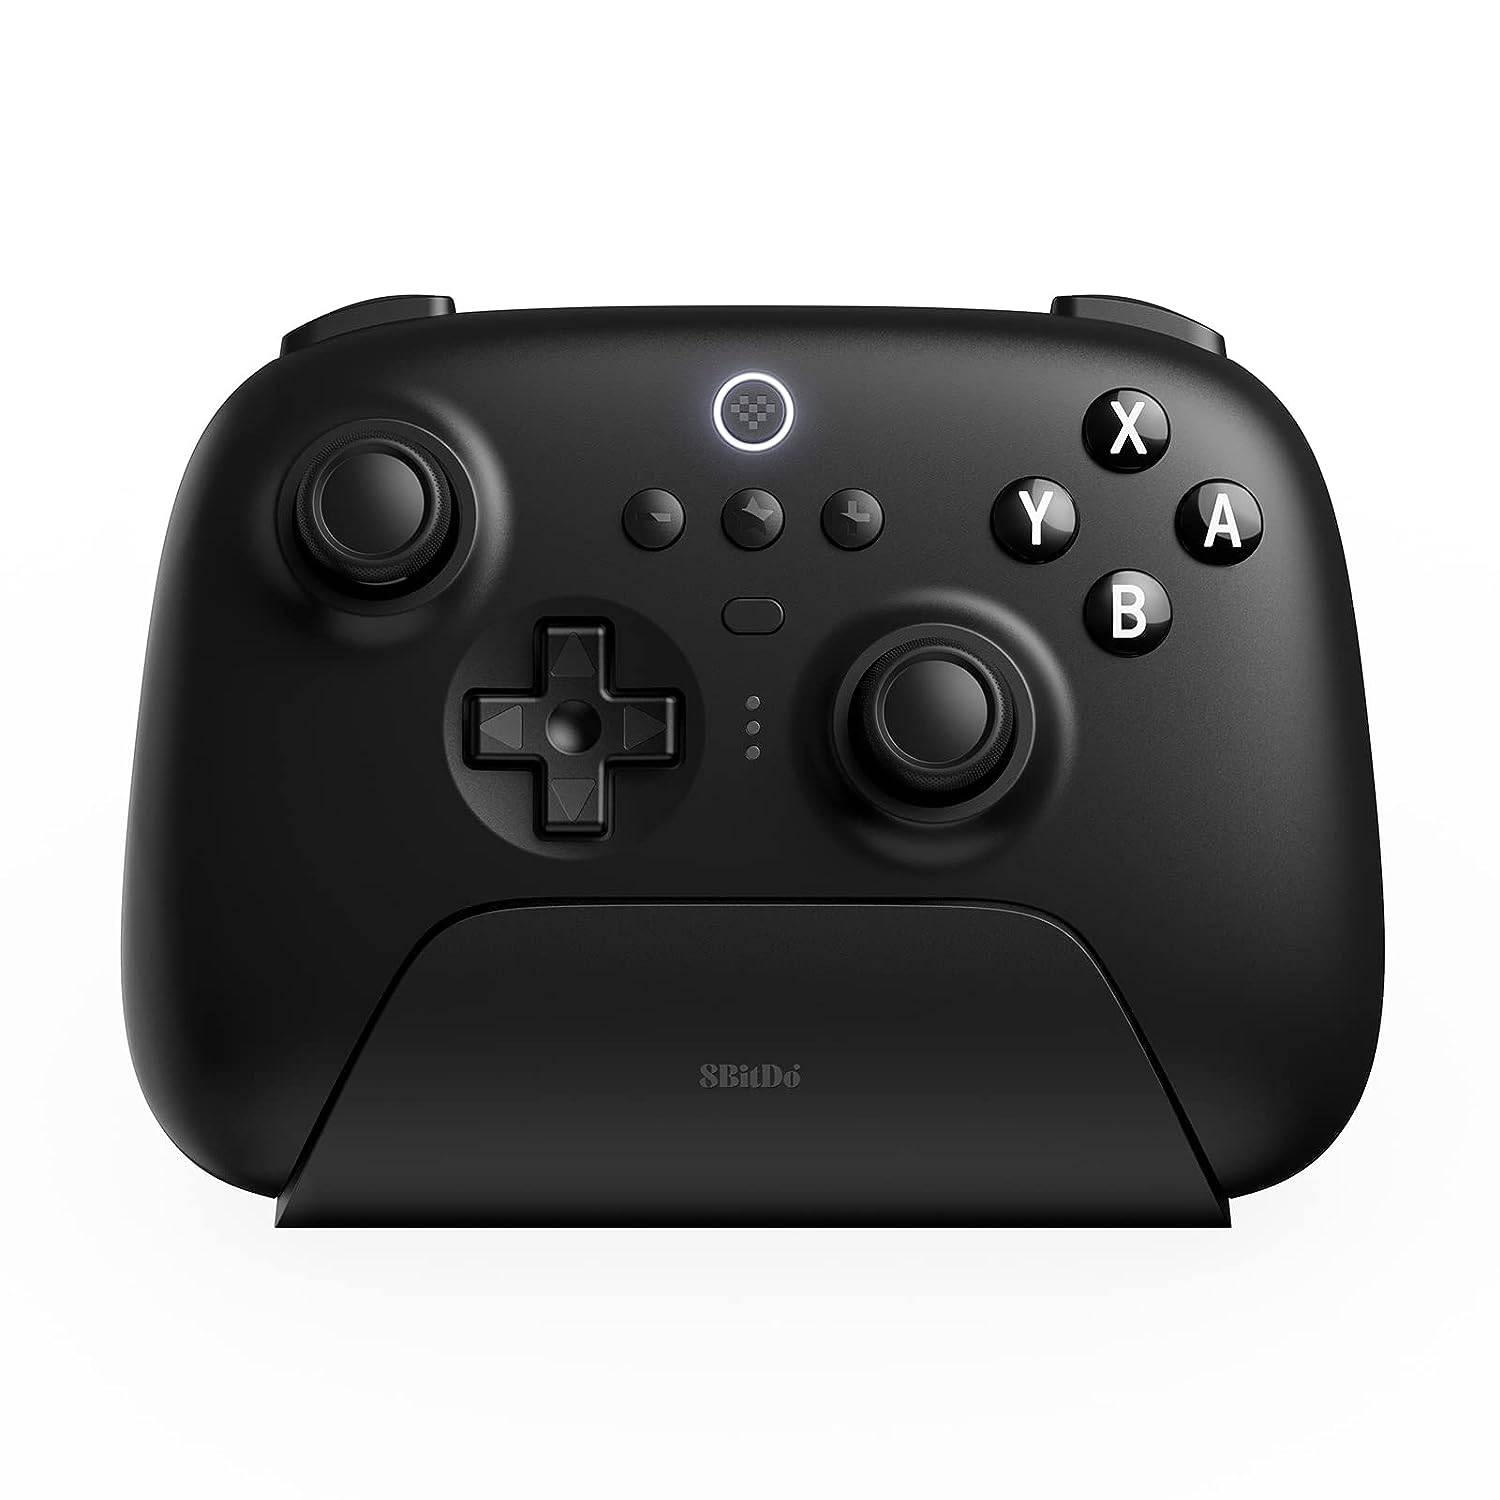
8BitDo Ultimate Controller
The 8BitDo Ultimate Controller is a versatile option, compatible with multiple platforms and offering a nostalgic yet modern gaming experience.

GuliKit KingKong 3 Max Controller
The GuliKit KingKong 3 Max is praised for its drift-free Hall effect sticks, ensuring a smooth and reliable gaming experience.

PowerA Wireless GameCube Style Controller
For fans of the classic GameCube design, the PowerA Wireless GameCube Style Controller offers a familiar feel with modern wireless capabilities.


-
1

Sakamoto Puzzle Unravels in Japan
Jan 27,2025
-
2
Arise Crossover Trello and Discord
Mar 16,2025
-
3

Roblox King Legacy: December 2024 Codes (Updated)
Dec 24,2024
-
4

Slither, Compete and Outlast Your Opponents in New Game Snaky Cat
Feb 26,2025
-
5

Roblox Forsaken Characters Tier List (2025)
Feb 25,2025
-
6

Eighth Era celebrates 100,000 downloads with a limited-time Era Vault event
Mar 17,2025
-
7

Google Play Awards 2024 winners include Squad Busters, Honkai: Star Rail, and more
Jan 09,2025
-
8

Select Quiz lets you test your knowledge across multiple topics
Mar 17,2025
-
9
Roblox: DOORS Codes (January 2025)
Jan 07,2025
-
10

Animal Crossing: Pocket Camp Complete - Where to Farm Snacks
Jan 08,2025
-
Download

Magnet Hero
Action / 45.6 MB
Update: Feb 11,2025
-
Download

Bulma Adventure 2
Casual / 57.55M
Update: Mar 09,2024
-
Download

!Ω Factorial Omega: My Dystopian Robot Girlfriend
Casual / 245.80M
Update: Sep 10,2024
-
4
FrontLine II
-
5
ALLBLACK Ch.1
-
6
IDV - IMAIOS DICOM Viewer
-
7
Escape game Seaside La Jolla
-
8
Color of My Sound
-
9
beat banger
-
10
Mr.Billion: Idle Rich Tycoon